.svg)
.avif)
Conversion Rate Optimization (CRO) is essential for turning visitors into customers. This guide walks you through the 5 clear steps to set up and run high-impact A/B tests using Webflow Optimize.
Summary: Your 5-Step Optimization Roadmap
This tutorial covers the entire process, from generating your first idea to reviewing the results:
- Step 1: Generate & Validate Your Test Ideas
- Step 2: Create a New Optimization Test
- Step 3: Define Variations and Traffic Allocation
- Step 4: Enable Tracking and Launch the Test
- Step 5: Review Results and Personalize
Step 1: Generate Ideas
Before you start testing, you should have a solid idea of what on your website needs improvement. For a beginner, you could start with major, highly visible elements such as your Hero Section, testing a different primary image or headline copy. You can also adjust your Site Copy and Value Proposition or change the visual presentation of your Core Offers or Lead Magnets. However, the best ideas come from user behavior data. If you have already studied your analytics, then concentrate your efforts on areas where users are falling off or hesitating. Start with a generally accepted hypothesis and then refine it based on the actual results you receive.
Step 2: Create an Optimization
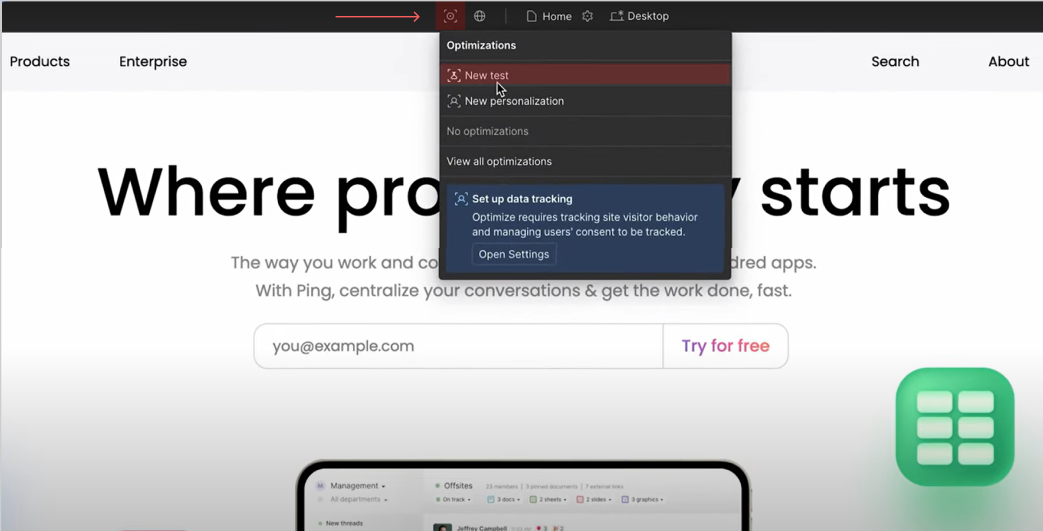
Imagine your goal is to optimize a primary Call-to-Action (CTA) button on your website. This is where you begin the process in Webflow Optimize.

Once you activate your optimize you can click on the optimization button on your website and click on New Test.
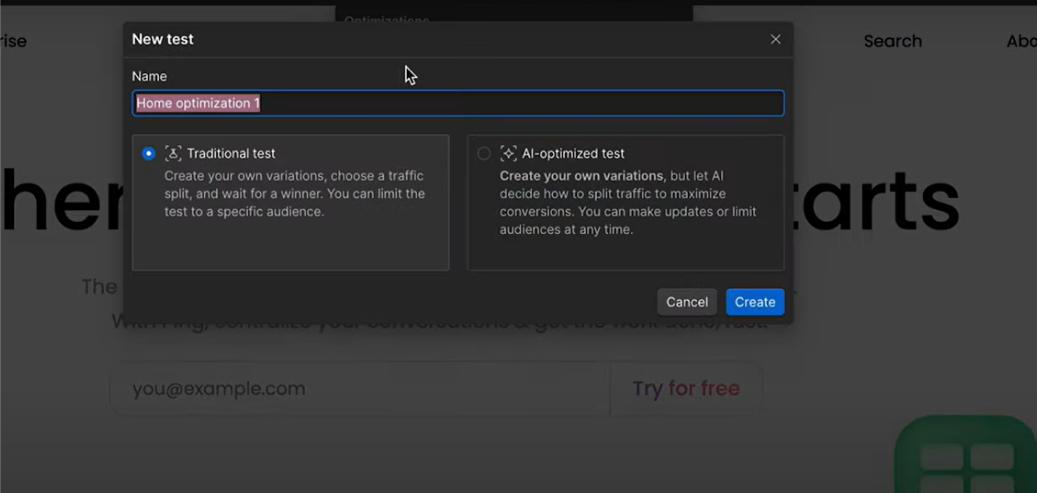
The concept of these tests is to compare two variations of one variable at the same time and then decide which one works better. For each test you can see you have two options of traditional and AI-Optimize test.
Traditional vs. AI-Optimize Test
To explain the difference, AI Optimize harmonizes the worth of testing and personalization. Using machine learning, it automatically identifies visitor profiles and allocates them, in real time, to the top-performing Variation. It removes the need to evenly divide traffic or specify audiences in advance. The AI optimizes traffic allocation continuously to minimize exposure to low-performing experiences and maximize conversion yield. Such a method is ideal for rapidly testing many advanced combinations.
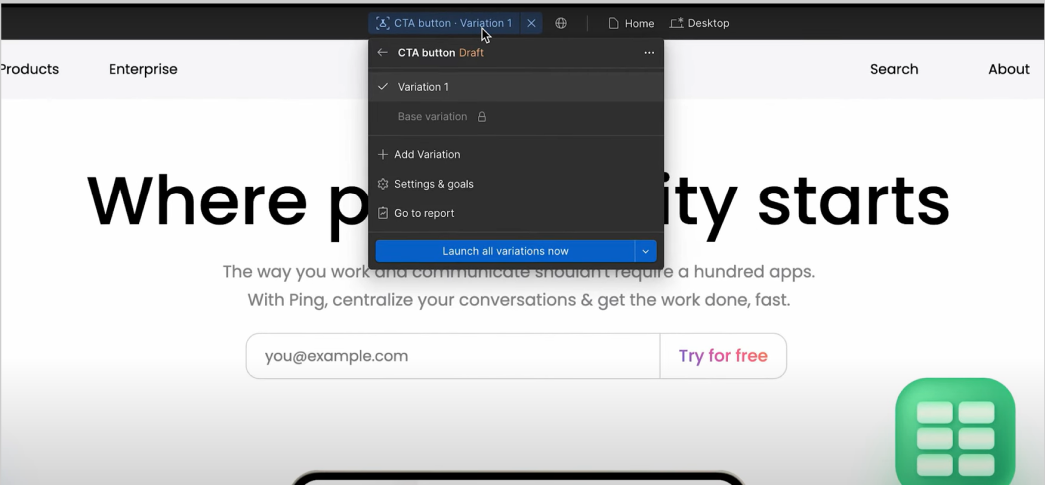
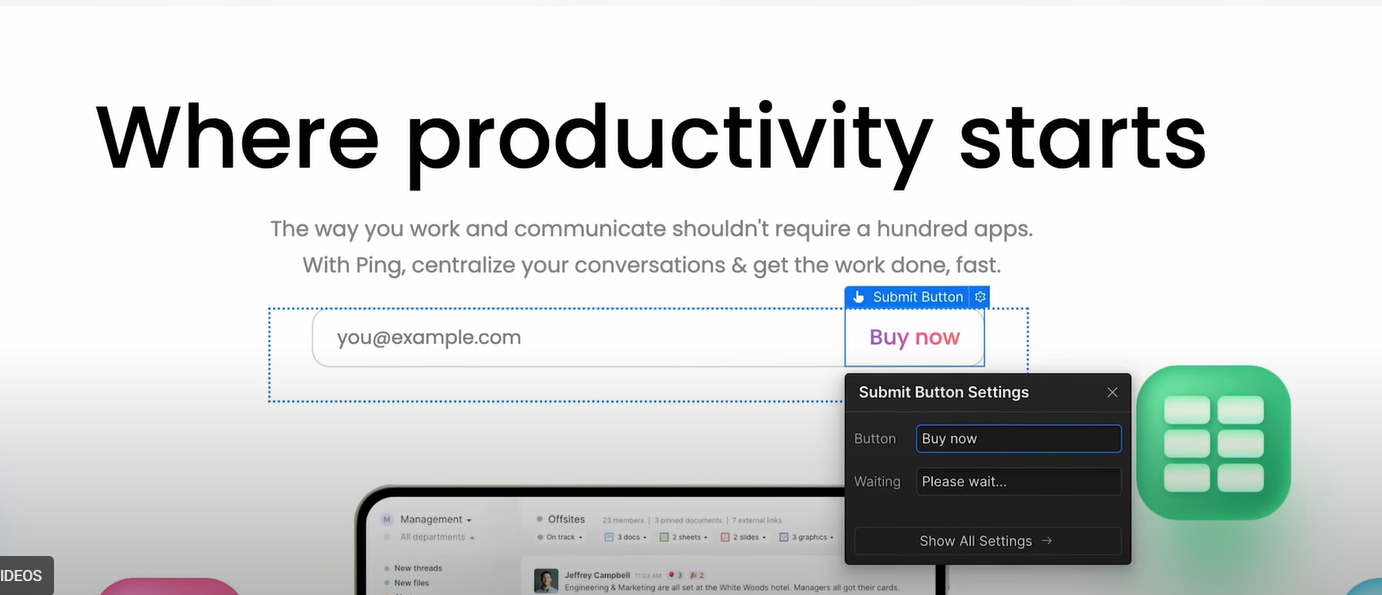
For now we will continue with the traditional test. After defining a test you need to create your variations, on the top of your website you can see which variation you are working with. As you can see in the picture the base variation is the current CTA that we have on our website and Variation 1 is what you want to work on to make it better. You can rename variations based on whatever name you wanted to.
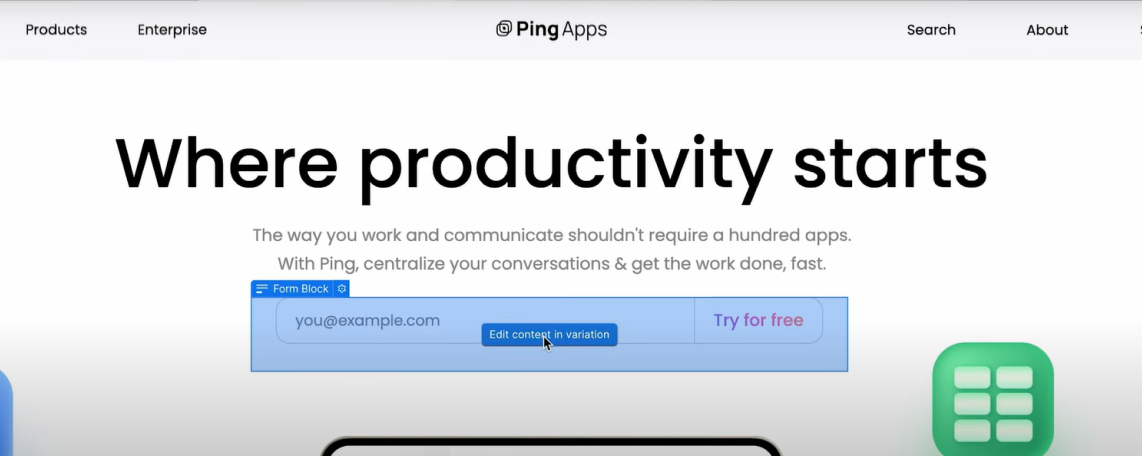
Let's assume we wanted to change the CTA from “Try For Free“ to “Buy It”, you can click on the CTA button and choose edit content on the variation, after that you just need to type in the new CTA. To set the second variation you can do the same process.
Step 3: Allocate traffic.
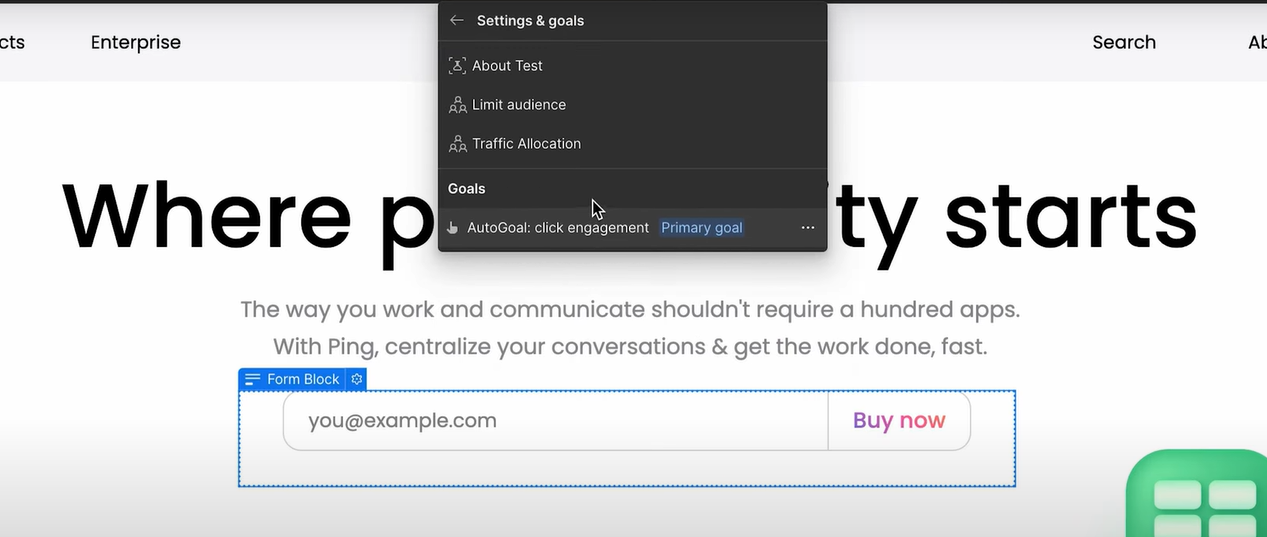
Now that we set up our variation we need to define how much of our website traffic should see one variation. To do so, you need to go to the setting and goals. Here you can choose the traffic allocation evenly distributed between all variations or your manual split of your choice.Your choice for manual allocation depends on your hypothesis and the risk tolerance for the test.
Step 4: Lunch
Before sending live traffic to your variations, ensure Webflow can track the data accurately. First, go to your site's Insights settings and confirm the data tracking button is turned On. Then, return to your test setup page and Launch your optimization. Your visitors will now be exposed to the different variations based on the allocation split you set in Step 3.
Note that if you had chosen an AI-Optimize Test, you would not need to set a manual traffic split, as the AI would continuously adjust traffic based on user behavior in real-time, automatically serving the best-performing variation.
Step5: Review
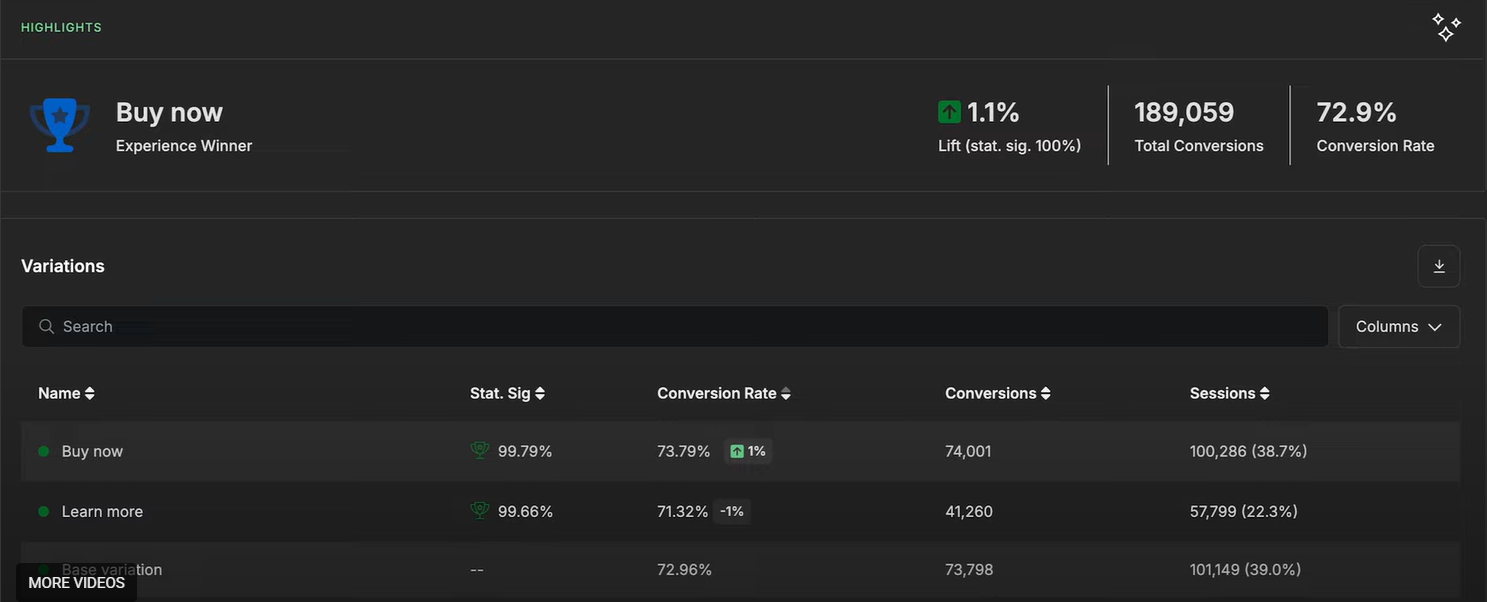
As users start interacting with the CTA button on your site, the results will be automatically gathered by Webflow Optimize. To review the performance, go to Insights, where you'll find the key metrics for each variation, such as conversion rate and confidence level shown. When you reach a statistically significant result, you can declare a winner-the best-performing version-and end the test.
Advanced Optimization: Personalization
Once you have a clear winner, you can take this effort one step further by using the AI optimization features. Create serves the best variation continuously to the user with an even more personalized touch. The recommended strategy is to use a Traditional Test first to confidently find the single best variation, then run an AI-Optimize Test on that winning component for the most personalized and effective results possible.

.avif)
.jpeg)