.svg)
.avif)
Webflow is upgrading its hosting infrastructure to boost performance, reliability, and security. As part of this, they are migrating secure network connections to Cloudflare, offering superior DDoS mitigation and faster global response times. You may need to update one or more of your custom domain's DNS settings before November 3rd,2025.
How do you identify your domain that needs updating?
When you log into your Webflow account, you'll see an in-app notification if your site is affected. To check all your domains at once, simply click the "Review all domains" button on your dashboard.
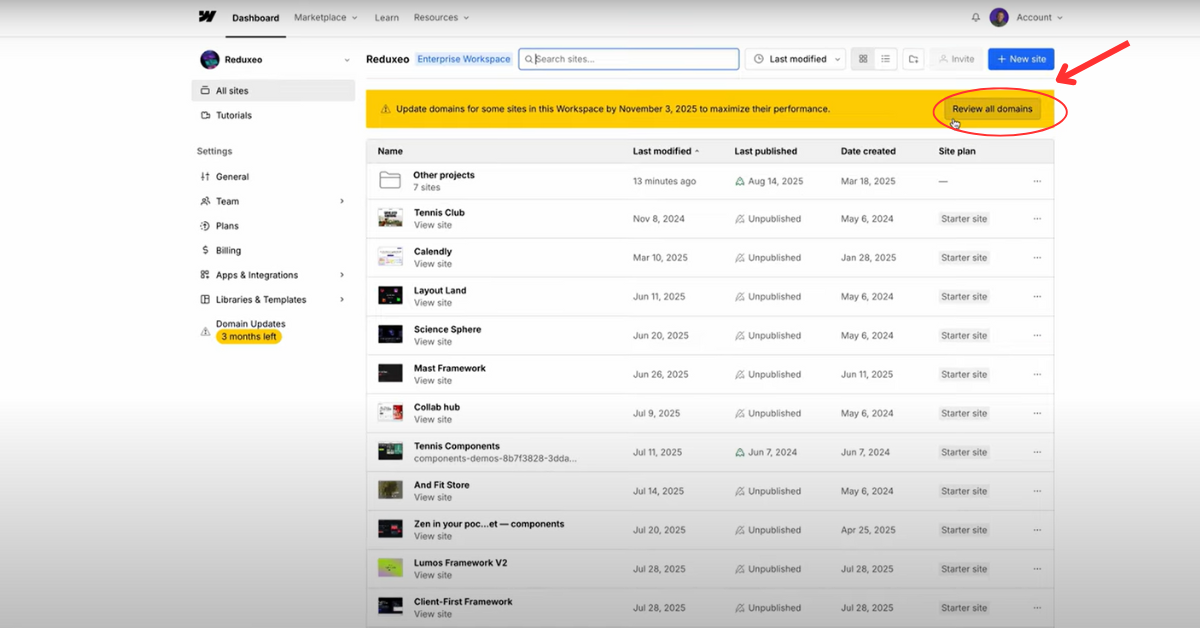
This page will show you a list of all your sites. Look for any with a yellow “Update DNS” status. from there you can identify the status of websites that needed update.
How do you make DNS changes, automatically?
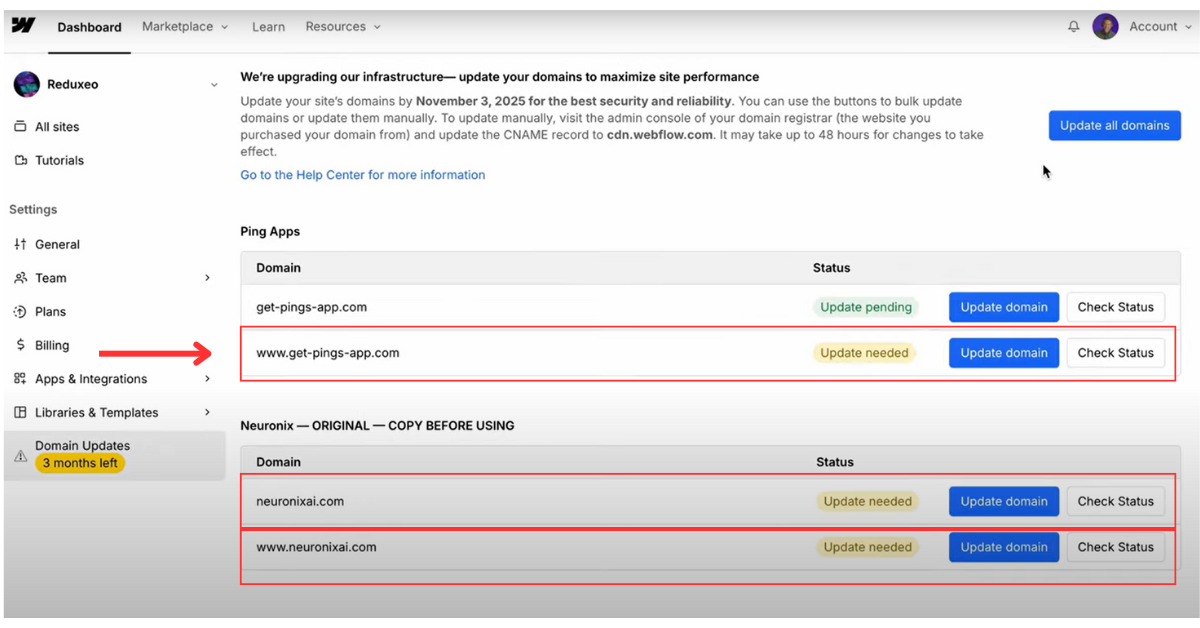
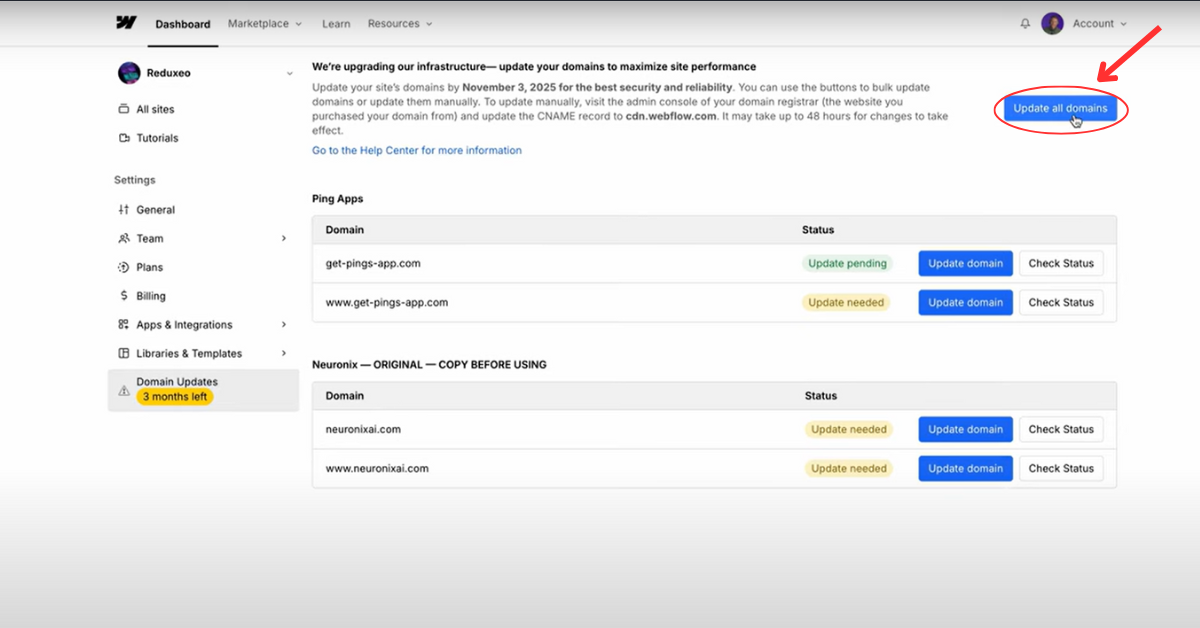
The quickest and easiest method is to let Webflow handle the updates for you automatically. This is the best option for most users, and it takes about 10 minutes. To make it as simple as possible, we can update all domains with a click. You'll just need to access your DNS provider account for each domain.
Here's how to do it:
- From your Workspace settings, click on the DNS update section.
- Click the "Update all domains" button.
- Click Continue to authorize Entri
- Log in with your credentials for your domain registrar (e.g., GoDaddy, Namecheap, or IONOS).
- Follow the prompts to connect and authenticate your domains.
For more information you can check the official Webflow documentation.
How do I manually migrate my DNS records?
If you prefer to make the changes yourself, you'll need to visit the domain console of your domain registrar.
Here are the steps to follow:
- Log in to your domain registrar’s dashboard and find the DNS settings for your custom domain.
- Delete any existing A and CNAME records for your Webflow site.
- Add the two records below at your registrar:
| Record type | Hostname | Value |
|---|---|---|
| A | @ | 198.202.211.1 |
| CNAME | www | cdn.webflow.com |
After saving, go back to your Webflow site’s settings, then to Publishing > Production, and click “Check status” to verify the changes. Repeat this process for every site that needs to be updated.
To learn more about it you can check the Webflow article.

What Happens Next?
Once you've completed the update, the domain status will change to “Update pending.” Keep in mind that it can take up to 48 hours for DNS changes to take effect across the internet. And you can check the status for each domain from the “Review all domains” page. When the changes have been made, the status will say “connected”.

⚠️ if you have more than one domain, you'll need to run through this process for each work space.
We're Here to Help
As always, we are here to help all our current and past clients migrate their infrastructure with no cost. If you're a bit unsure about this process, just book a call with us to help you get set up.
