.svg)
.avif)
Related articles:
To follow this tutorial, you will need a Webflow plan that allows you to add custom code to the page settings.
How do we change the default cursor?
We will use the CSS Cursor property to get the effect, we are looking for. This property defines what cursor will be displayed when pointing over a given element.
Although there are many pre-defined options for the Cursor property, we also have the option to add a custom image by specifying a url() linked to the image we want as the cursor.
Before we begin, there are some guidelines to follow:
- The recommended image size is 32x32 px.
- The max image size is 128x128 px.
- Cursor will not be displayed on touch screen devices.
Ok, let’s jump in!
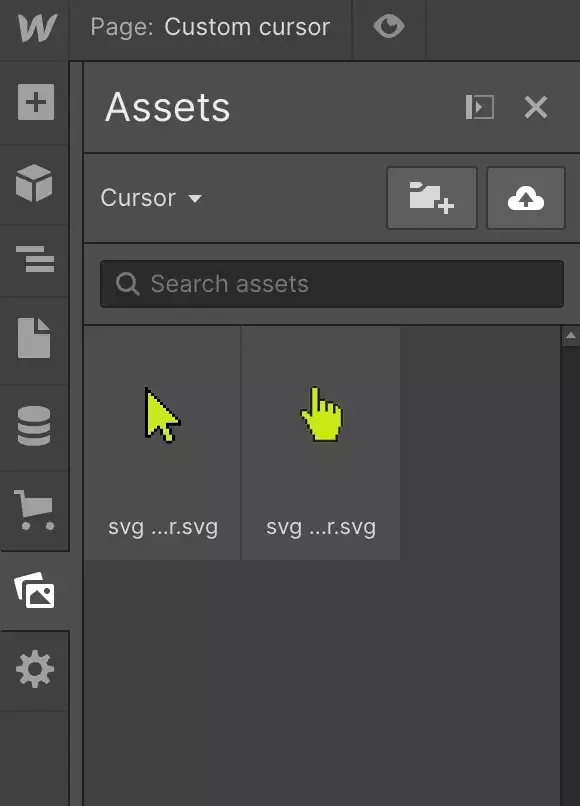
Upload cursor images to Webflow assets
Upload the images you want to use as a cursor in the Webflow assets panel. I’ve uploaded a cursor for the default state and a pointer cursor that will be used for hover states.
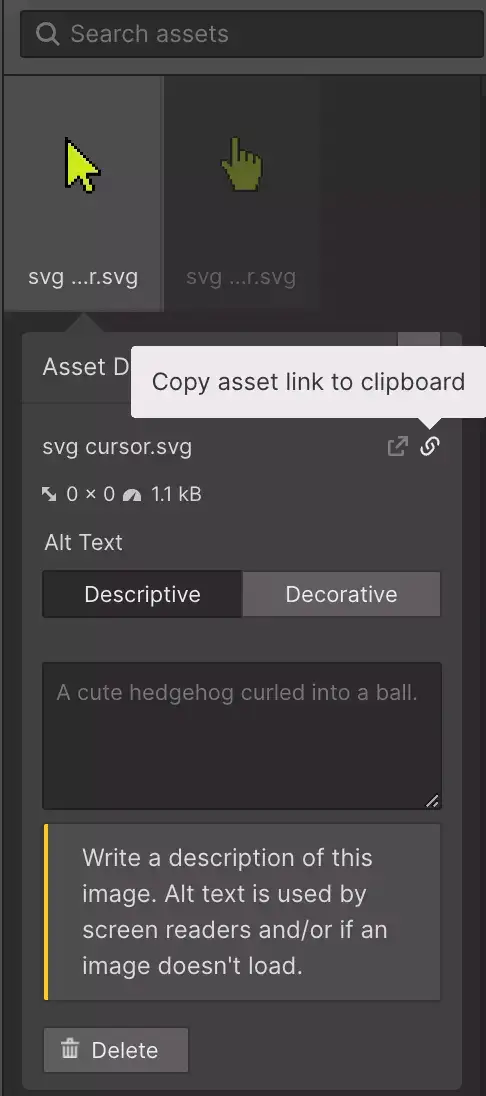
Copy the links from each uploaded image in the assets panel
In the assets manager, click on the settings icon on the top right of each image. Copy the link of the image. These links will be used for the url() when adding the custom cursor in the CSS.
Add CSS to the custom code section in page settings.
To add the CSS, go to the custom code section on the page settings.
•On the body, we apply the default cursor that will be seen when nothing hovers over. The url to be added is the image link you copied in the previous step.
•For any elements that do not link and you would like the cursor to change on hover, we add the class ‘cursor-hover’ to the element.
•Finally, we add the hover state for all the <a> </a> tags on the page (these are all the links on the page).
•Remember to use the correct image link for the default cursor and the hover cursor.
Remember to replace the above url's with your own images you uploaded to Webflow.
Once the CSS is added, publish your page, and have a look at your awesome cursor.
That's it
There we go! I hope you enjoyed this quick article on using custom cursors on Webflow. Stay tuned for more tutorials on how to make your Webflow website stand out.
More Webflow build tutorials: responsive vertical text and a scrolling marquee.
.avif)